Follow the steps below to create and embed a map widget.
Creating your map
To start creating a new map, log in to your portal, and click Create New under the Map Widgets section of the navigation panel.

This will open the map editor:
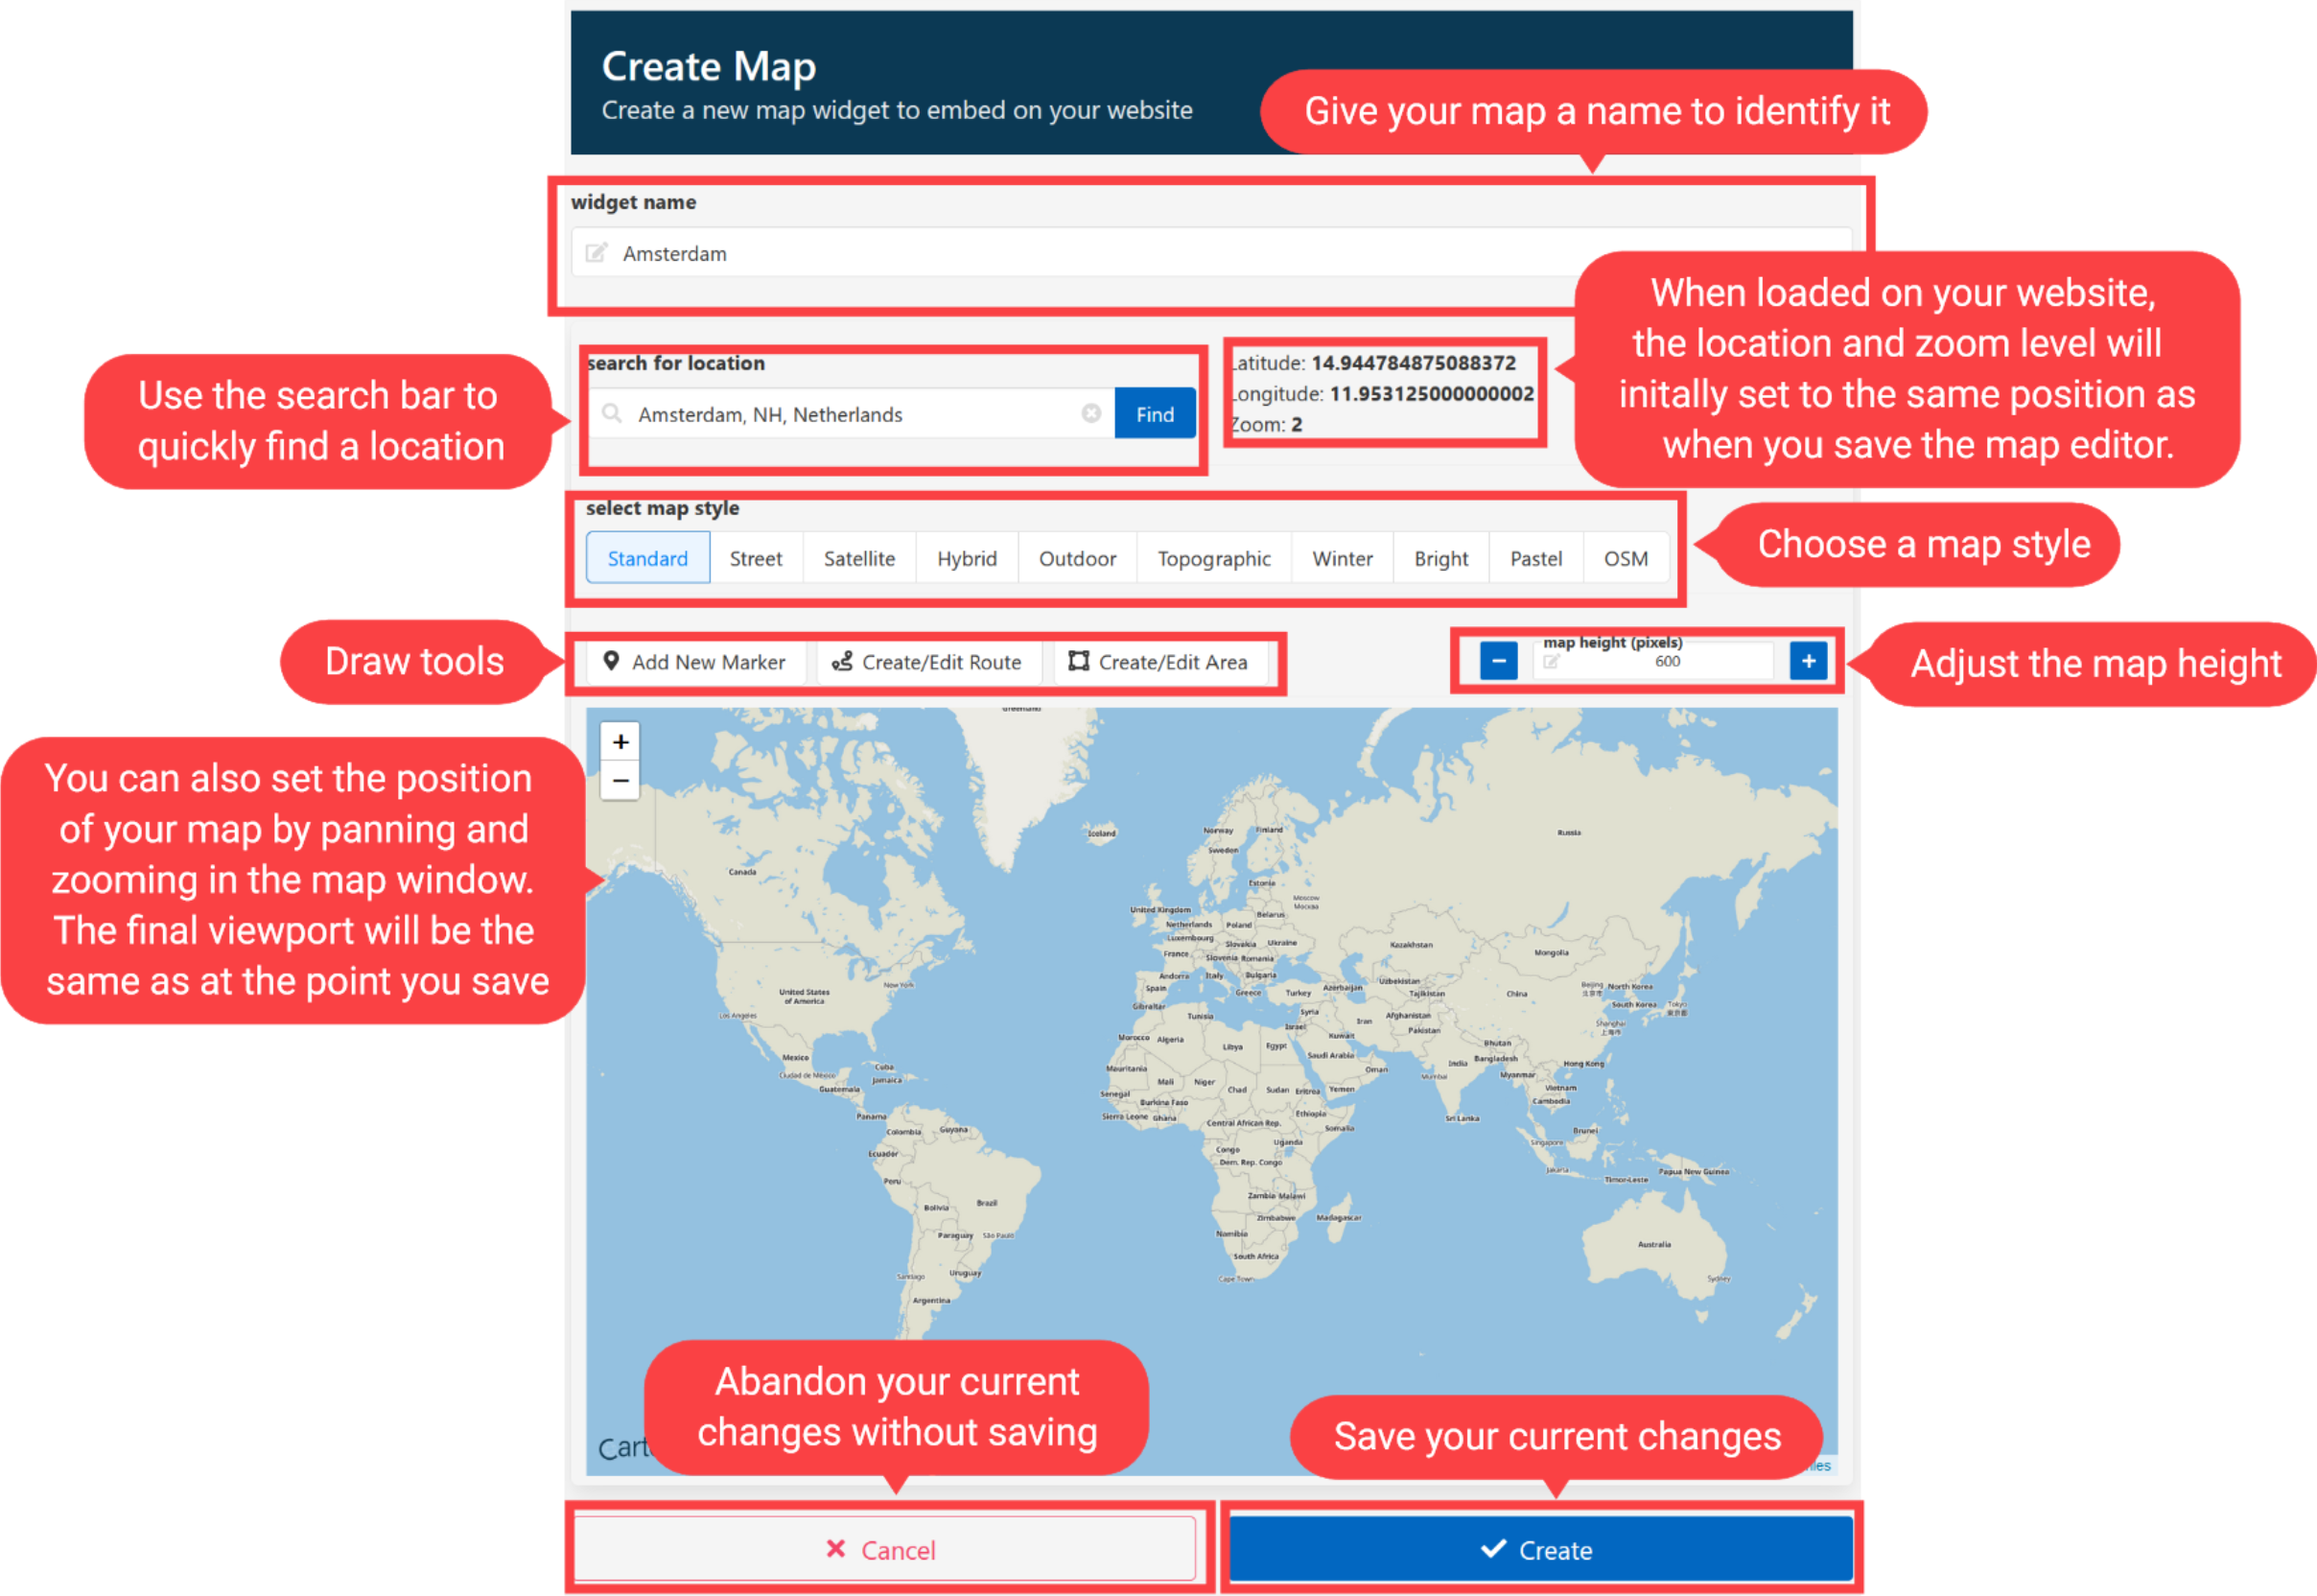
When rendered in your content, the location and zoom level will initally set to the same positions as you have saved in the map editor. So if you've altered the viewport during editing, remember to set it back to how you want it to first appear to the user.
You can change the style of your map to suite your content by selecting from one of the available styles. Try different styles to see what suites your map best.
(When adjusting the height, the value set is the height of the map itself and not the header area.)
Adding Markers
You can add any number of markers to your map with the following steps:
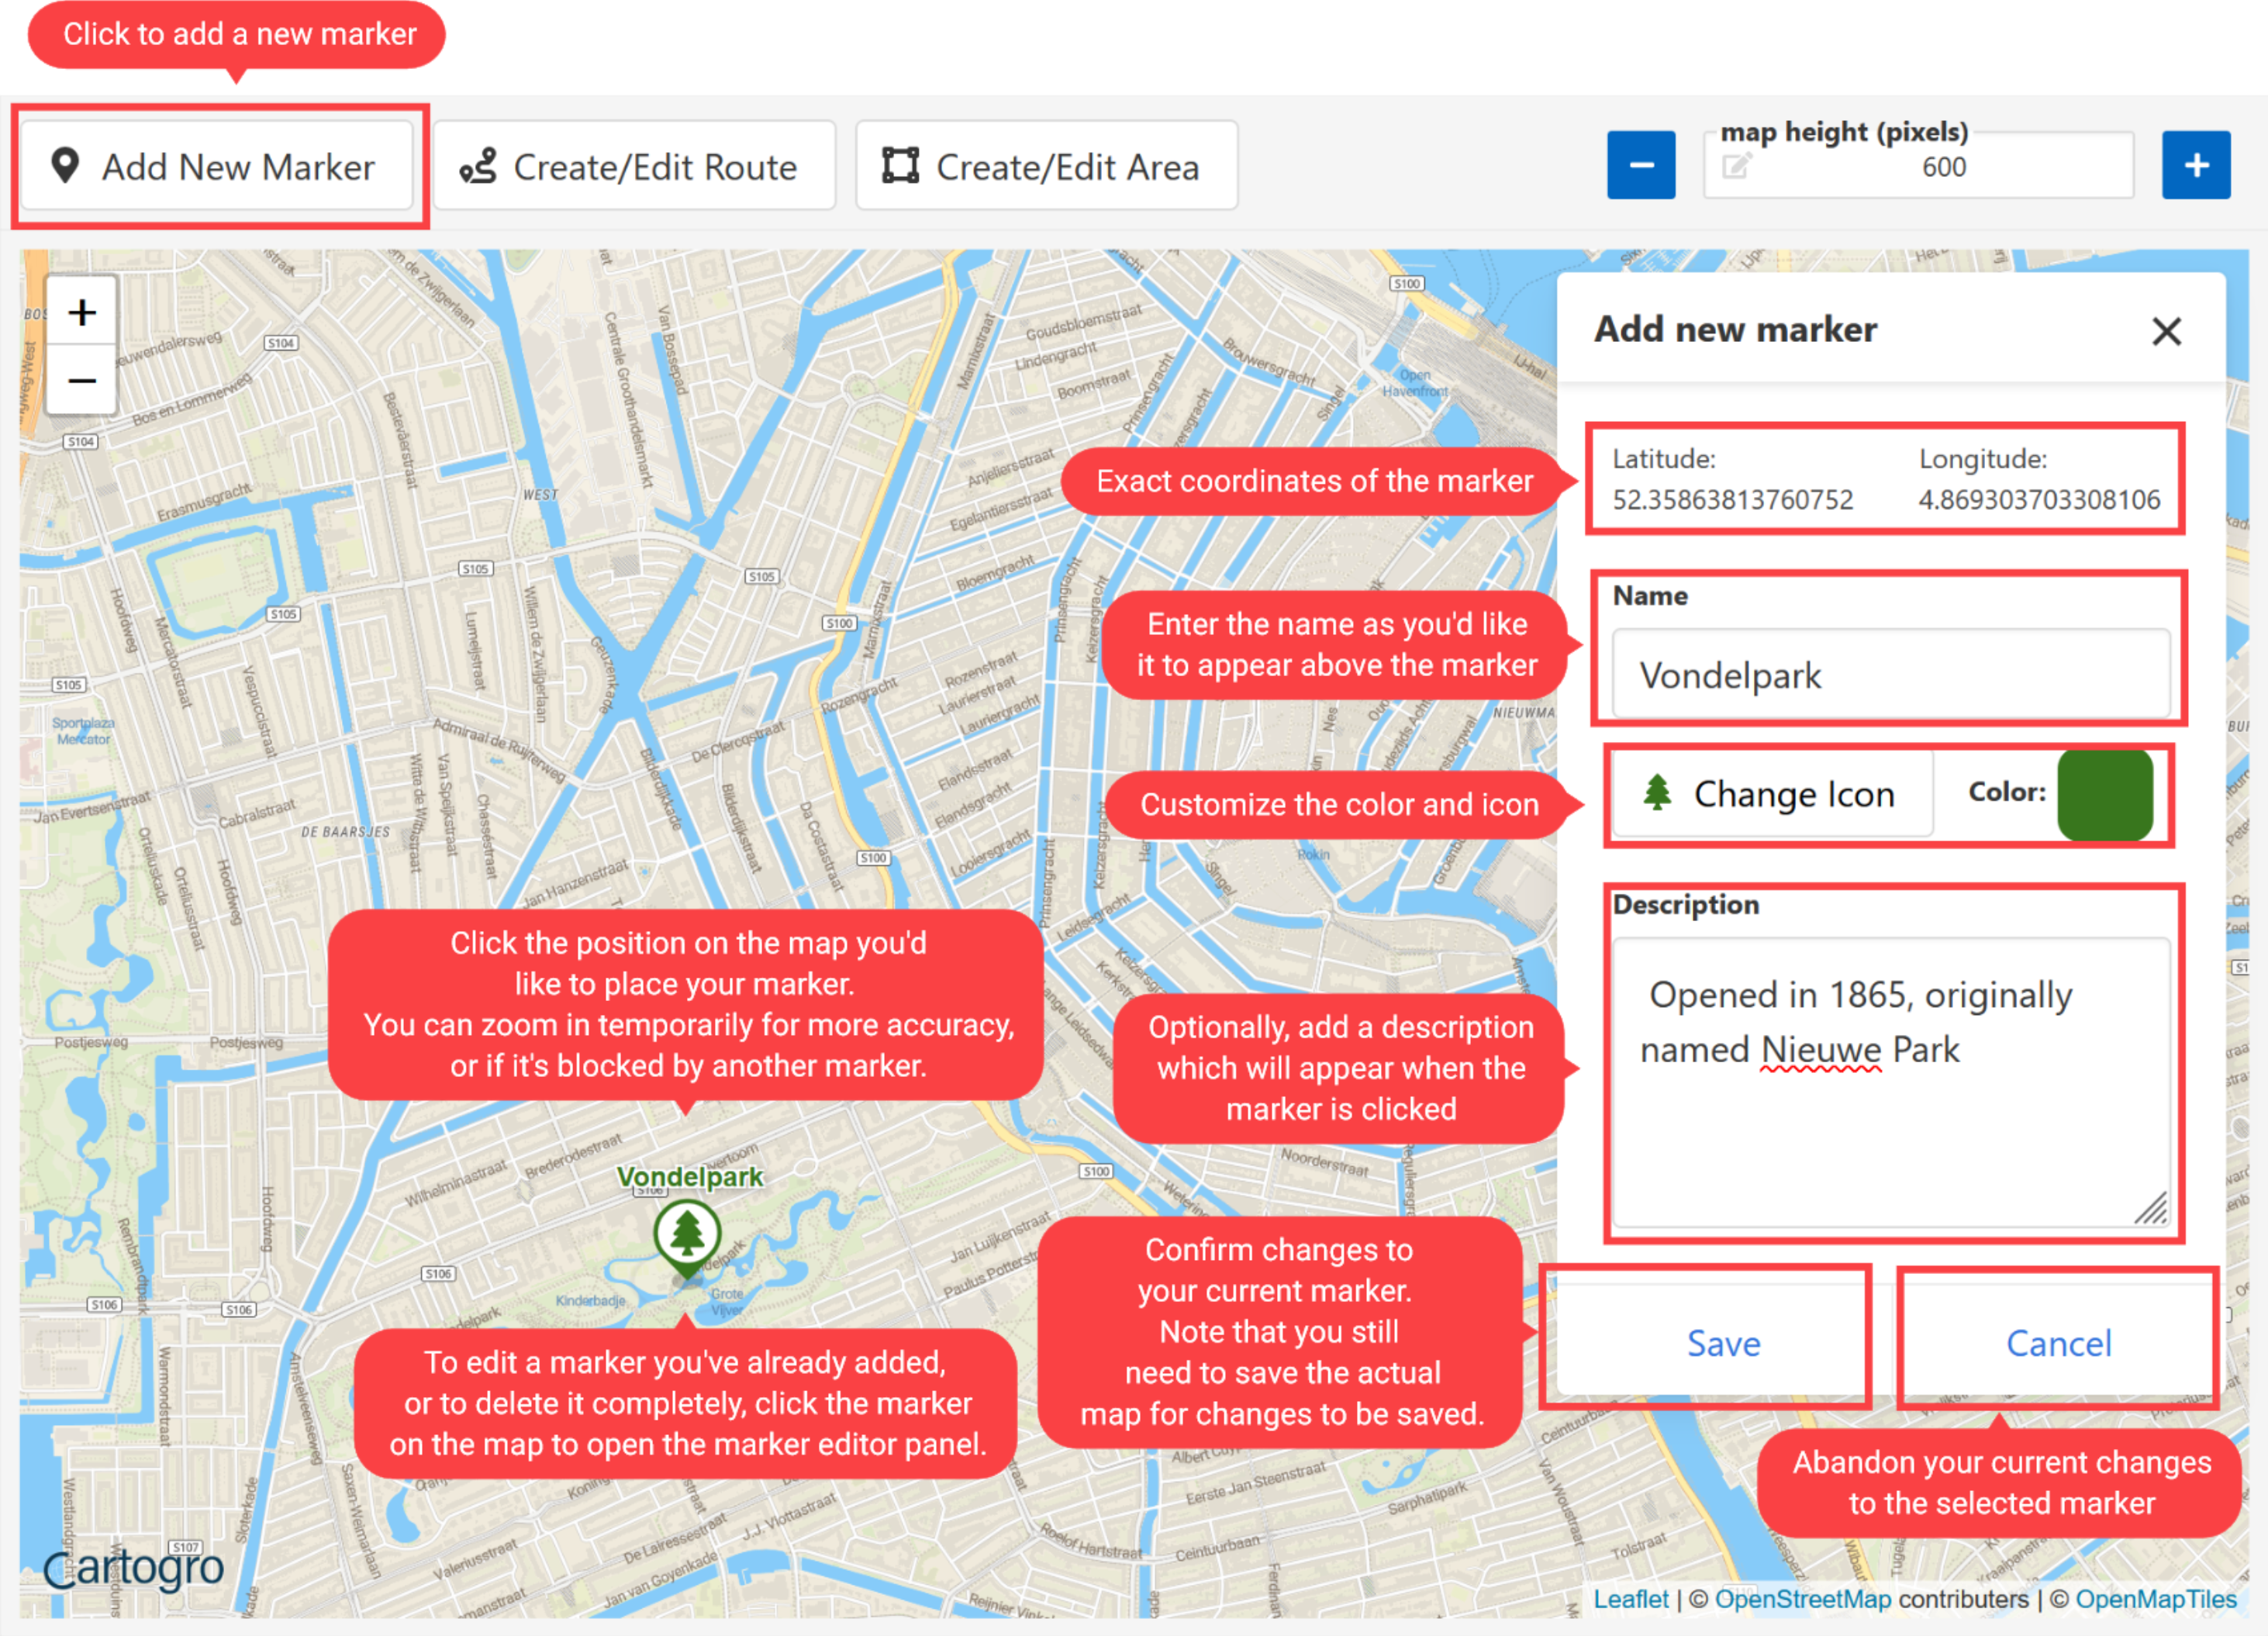
Remember that you will still need to save the actual map to save the widget with any markers you've added or updated. If you want to abandon your changes, click Cancel.
Adding a Route
You can add the following types of route to your map - When you click Add/Edit Route, you can select the type of route you'd like to add from the panel.
- Straight Lines creates simple straight lines that can be position anywhere.
- Driving creates a route along known roads.
- Walking creates a route along accessable roads and footpaths.
- Hiking creates a route along accessable hiking routes.
- Cycling creates a route along accessable cycling routes.
You will then open up the route editor panel and can create your new Route:

Remember that with the exception of Straight Lines, routes must be placed between places accessable for the selected transport type. Zoom in temporarily if you're having difficulty clicking an accessable point.
You can edit the route by adding more waypoints, but to modify existing waypints the route must be deleted and recreated.
Adding an Area
You can also draw an Area to highlight a region of your map, this works similar to creating a Route.
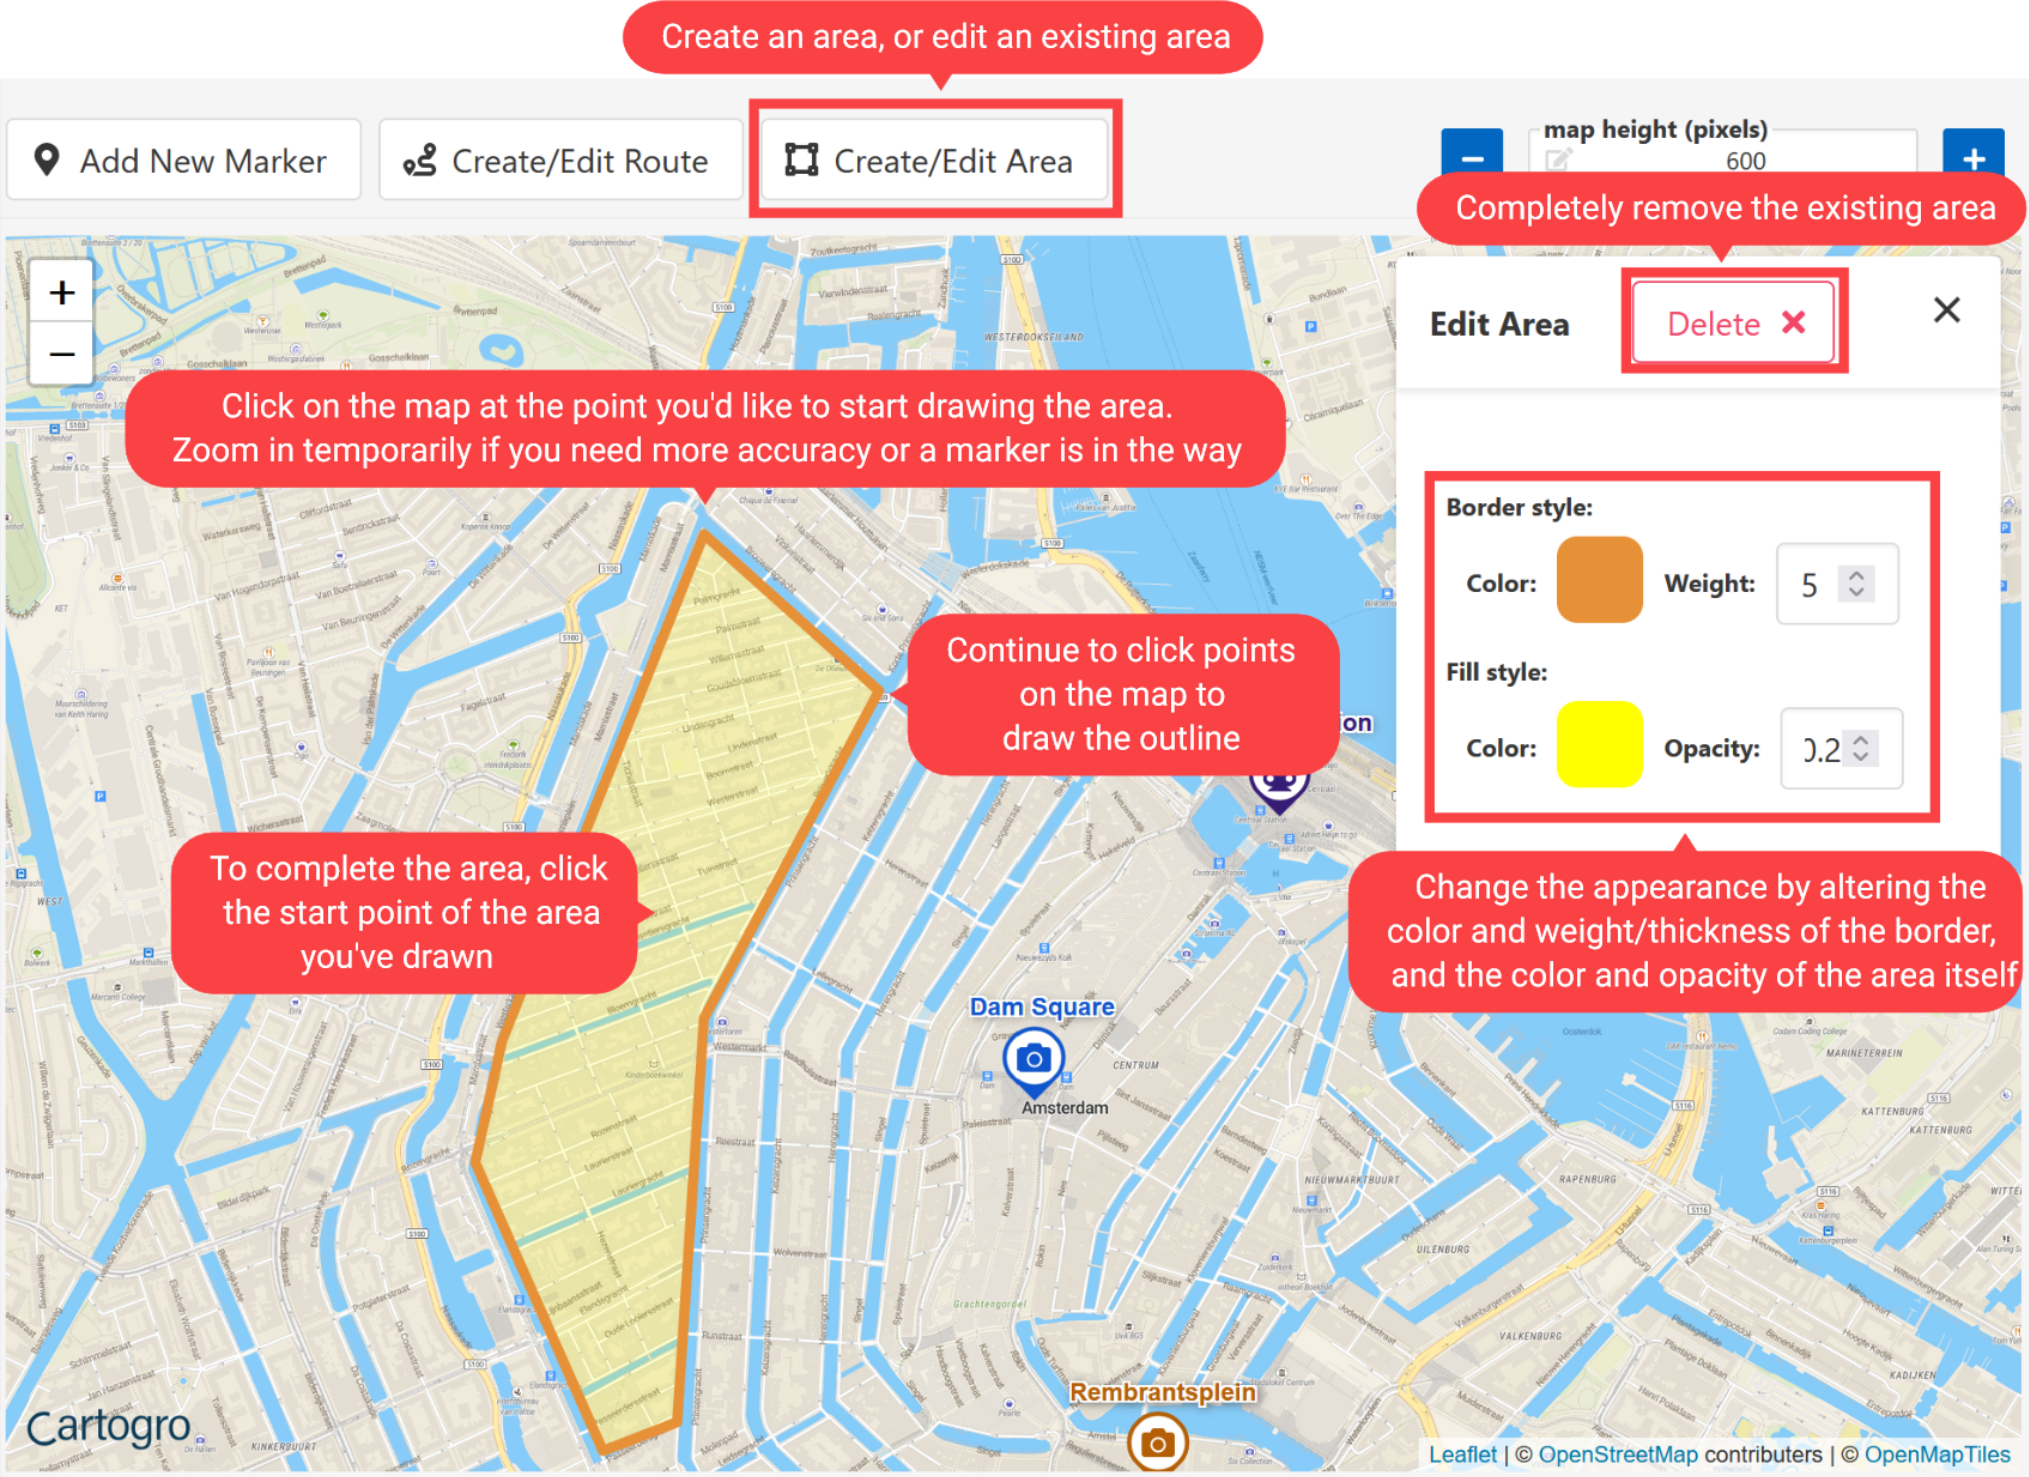
You can have as many points as you like, but you must draw the area back to it's original starting position to complete the Area.
Saving your changes
Remember to actually save any changes you've made, you must click the Save button at the bottom of the map editor.
You can save your changes at any time - but remember that the Zoom and Position will be saved as however it's currently set in the Map Editor.
If you want to close the editor and discard all your current changes, click Cancel.
Preview and Integration
Once you have saved your map, you can preview what it will look like on your website:
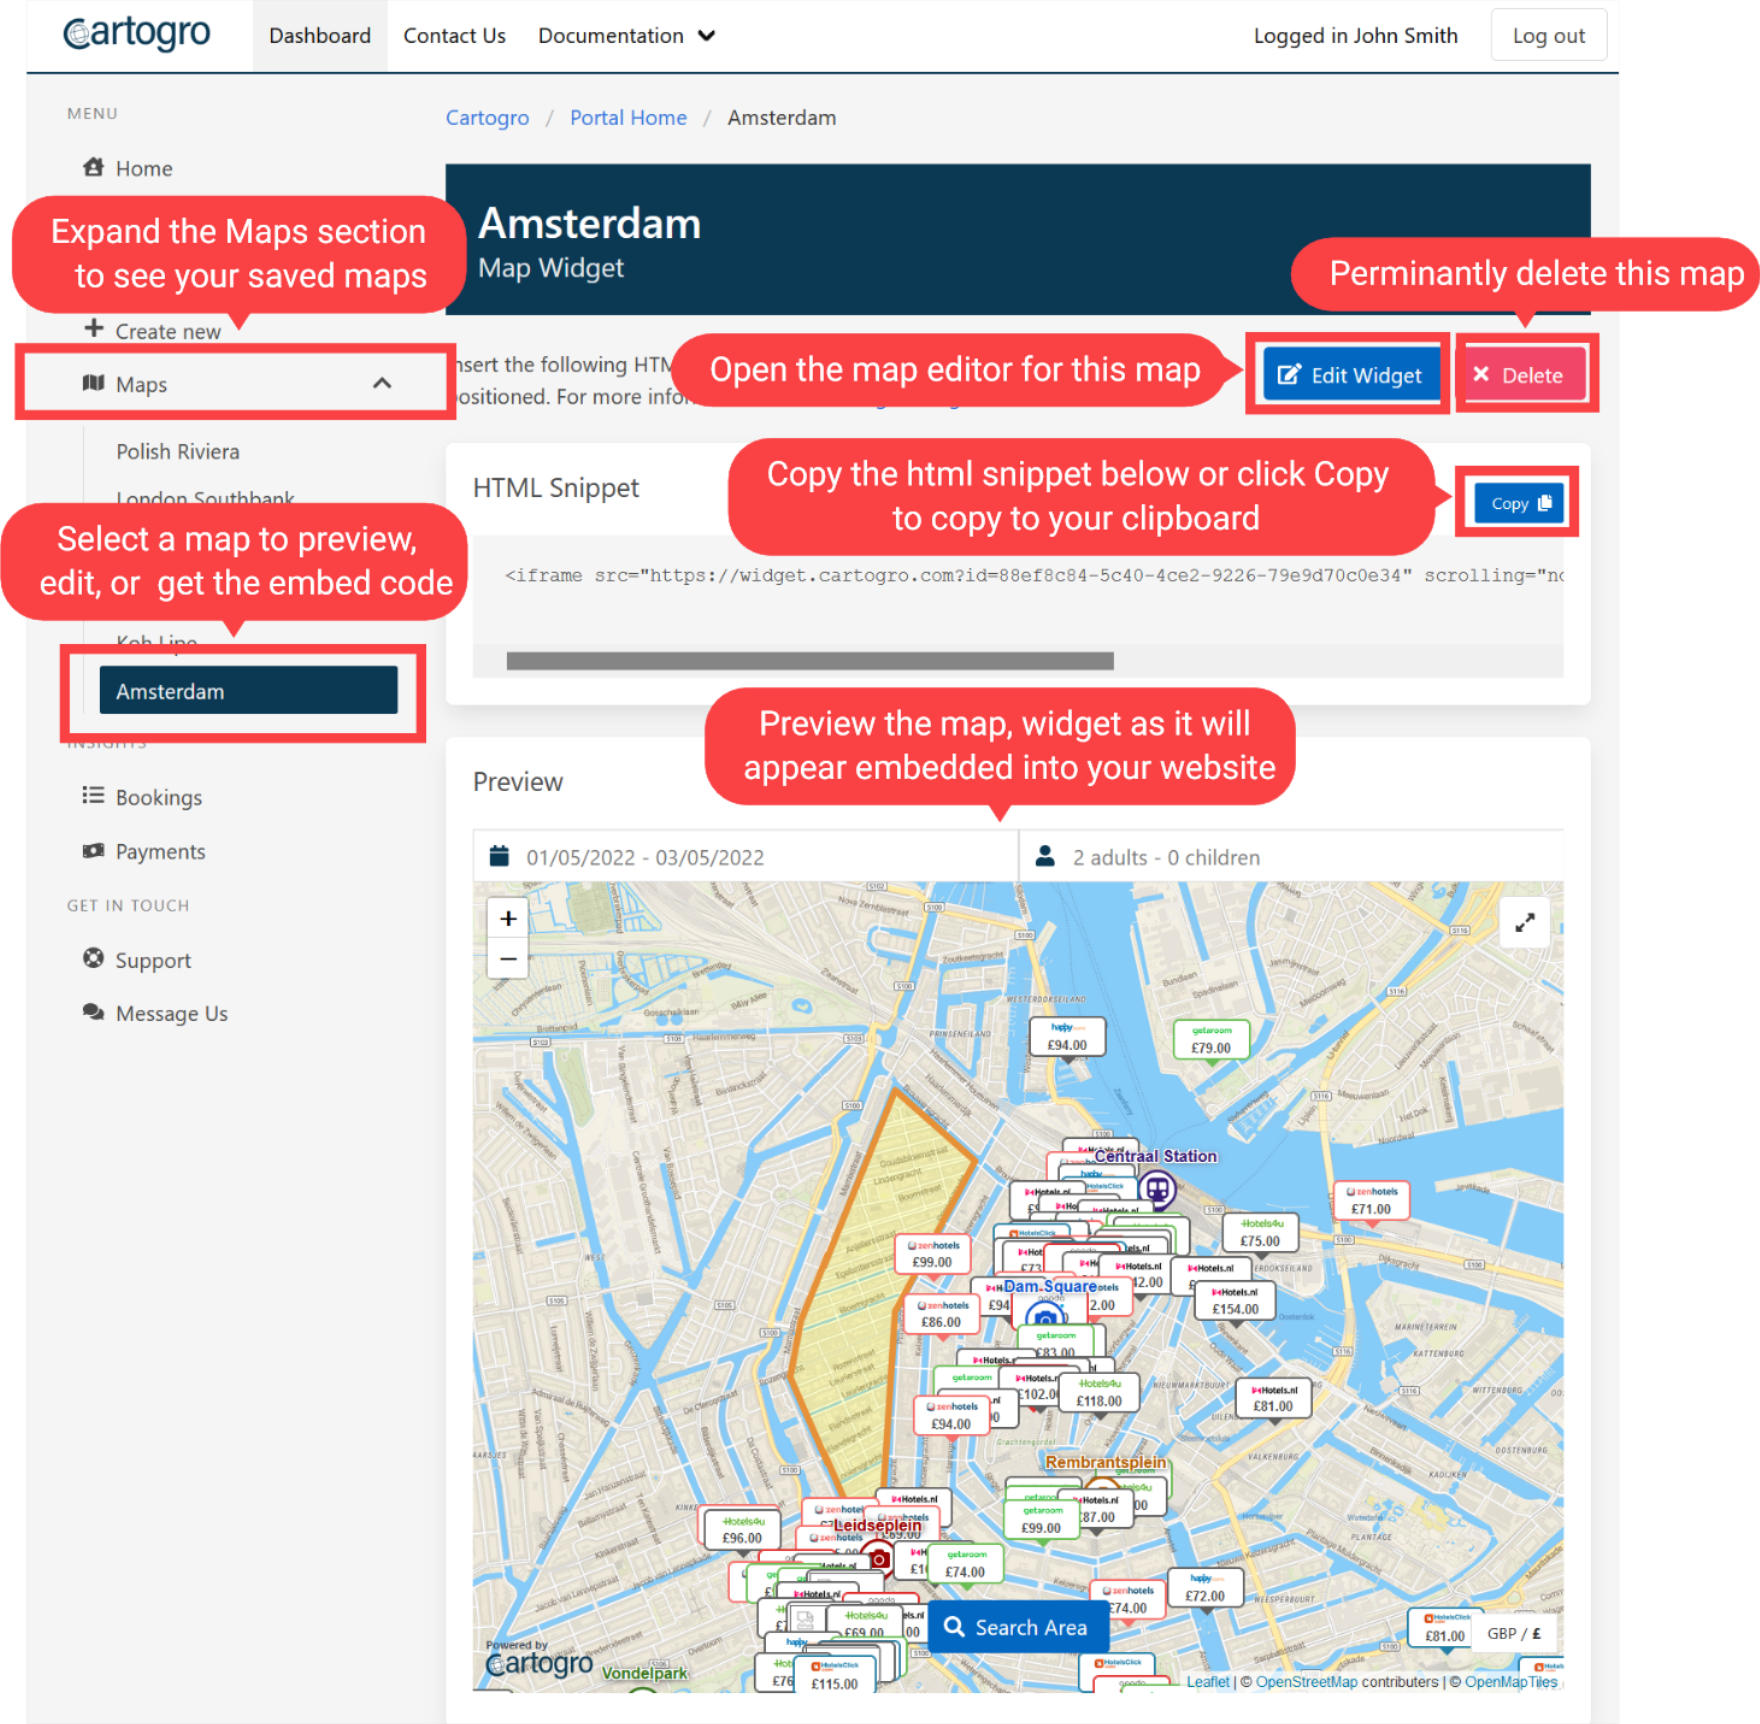
Once you are happy with your map, you can simply add it to any content by pasting the generated IFrame HTML snippet into the HTML of your page.
Click the Copy button to copy it to your keyboard, or copy it straight from the snippet. Then simply paste it into your HTML where you would like the map to appear. That's it!
If you make changes to your map, the only time you will need to update the IFrame HTLML is if you change the height. Any other changes will not alter the generated HTML
Monitor the performance
You can view any bookings made through your map widgets via the Bookings page, along with the status of the booking and the potential estimated commission.
You can view details of your payouts, previously paid and pending, via the Payments page
Update payment info
Payments will be made by PayPal unless otherwise arranged. To set your PayPal address to send commission to, submit it via the Payment Info section in the portal. Alternatively, email us at contact@cartogro.com. We will contact you via email to confirm any payment updates.

